This is actually my second try at making goggles for Blaze's Halloween costume. It's been a learning experience, but I got it right this time, and now other people can learn from my mistakes and not make the same ones.
From my first try, I learned:
The leather should not be too soft or it will not hold its shape
Gorilla Glue puffs up a lot as it dries, even if you don't add water (maybe it's just this horrible Florida humidity). This ruined my first set of lenses.
Glue alone, no matter how strong, will not hold a pair of goggles together once an 8 year old starts playing with them.
An adjustable strap is a must. Everyone in the house will want to try on the goggles and no two people will have the same size head.
O.K., now on to what should be done to make a nice pair of basic goggles.
1. Start with the outer ring of two mason jar lids (they don't have to be as old as these. These were the lids used to make the first set of goggles; the second set was newer).
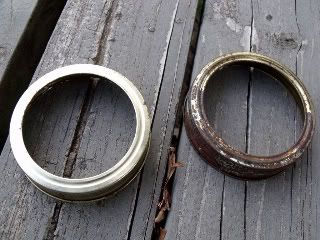
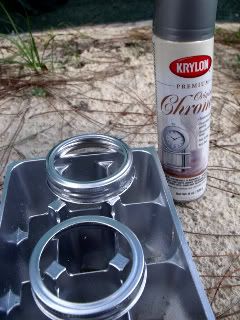
If the lids are rusty or the wrong color, spray paint with metallic paint. I set the lids on an old container from plant seedlings because it kept them off the ground and made it easy to spray paint all around the lids.
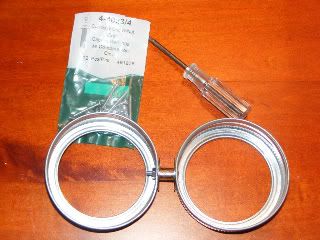
2. A sewing machine bobbin makes a great nose piece. Drill a small hole in each of the jar lids and use a nut and bolt to hold the two lids together with the bobbin in-between.
3. Trace the inner section of the mason jar lid onto clear plastic that is thin enough to cut with scissors. I used the plastic sheets that are made for printing out over-head projector sheets.
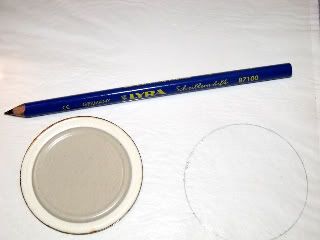
4. Cut out the lenses and glue them into the metal jar rings.
5. Cut out stiff leather for the 2 cuffs that fits into the metal jar rings and glue them in place.
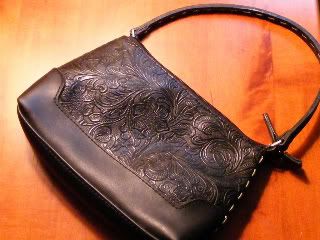
For the heavy leather, I cut apart this embossed leather purse that I bought for $1 at a thrift shop. The purse had a thin foam lining that I peeled from the leather and used separately.
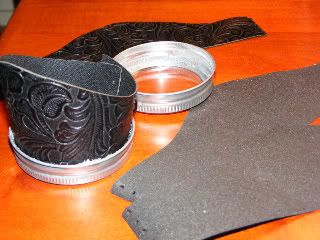
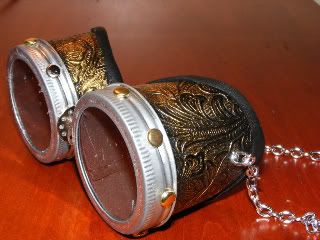
6. This step was not included in my first pair, but the cuff pulled loose from the metal ring, so on this pair, I drilled 3 small, evenly spaced holes through the metal and leather and inserted a brass brad into each hole ( there are probably stronger fasteners out there, but I have been trying to do this as cheaply as possible and I already had a box of brads.
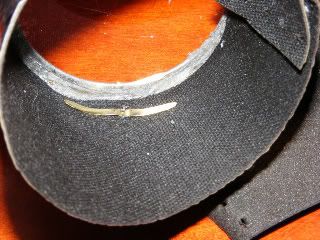
7. Glue the foam lining inside the leather cuff. This covers up the bolt from the nose-piece and the tabs from the brads.
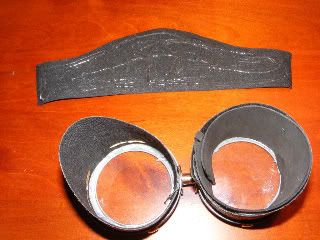
8. Optional: paint the cuff. I put a little gold acrylic paint on a piece of cloth and buffed over the leather.
9. Glue a 1 inch wide strip of cloth or soft leather around the raw edge of the leather cuff to give it a more finished look and make it more comfortable to wear. The soft leather nose-piece I added is not necessary. I added it to cover up a spot of spilled gold paint that I couldn't scrape off.
Also optional: I cut the tabs off of a few more brads and glued just the tops around the metal ring.
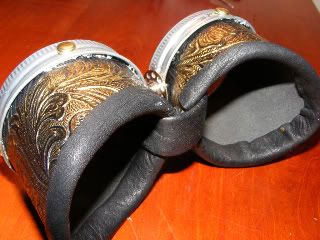
10. Poke a hole or cut a small slit in the cuffs to insert a chain or strap. I liked the way the chain looked, but a piece of elastic or a buckled strap ( thin old belt) would both work well.
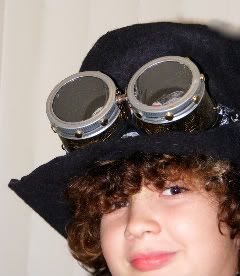
Another, less complex, way of making goggles for a costume can be found here:
Dragon Hunter's Goggles
but since when do I do things the easy way?
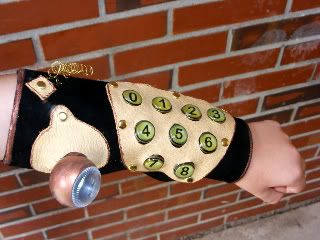
Just to prove this point, I didn't declare the costume finished after I'd made an acceptable pair of goggles. Last night I started making an armband, which Blaze says is his communicator. I just finished it about two hours ago.
This may have just displaced the squirt gun as Blaze's favorite part of the costume. He's been refusing to take it off since the moment it was finished and even wore it to the grocery store.


6. This step was not included in my first pair, but the cuff pulled loose from the metal ring, so on this pair, I drilled 3 small, evenly spaced holes through the metal and leather and inserted a brass brad into each hole ( there are probably stronger fasteners out there, but I have been trying to do this as cheaply as possible and I already had a box of brads.

7. Glue the foam lining inside the leather cuff. This covers up the bolt from the nose-piece and the tabs from the brads.

8. Optional: paint the cuff. I put a little gold acrylic paint on a piece of cloth and buffed over the leather.
9. Glue a 1 inch wide strip of cloth or soft leather around the raw edge of the leather cuff to give it a more finished look and make it more comfortable to wear. The soft leather nose-piece I added is not necessary. I added it to cover up a spot of spilled gold paint that I couldn't scrape off.
Also optional: I cut the tabs off of a few more brads and glued just the tops around the metal ring.

10. Poke a hole or cut a small slit in the cuffs to insert a chain or strap. I liked the way the chain looked, but a piece of elastic or a buckled strap ( thin old belt) would both work well.


Another, less complex, way of making goggles for a costume can be found here:
Dragon Hunter's Goggles
but since when do I do things the easy way?
Just to prove this point, I didn't declare the costume finished after I'd made an acceptable pair of goggles. Last night I started making an armband, which Blaze says is his communicator. I just finished it about two hours ago.
This may have just displaced the squirt gun as Blaze's favorite part of the costume. He's been refusing to take it off since the moment it was finished and even wore it to the grocery store.

Oh, so COOL!! Can't wait to see the whole ensemble!
ReplyDeleteWow! Very creative! :)
ReplyDeleteOh. My. Gosh.
ReplyDeleteThis is just so amazing...
Blaze, you have a very cool mom!
how cool! and i love the upcycled leather.
ReplyDeleteHoly Moly!!
ReplyDeleteThose are some Mad, Mad Skills you've got there!
Aycarumba!
Lisa, those are AMAZING!!!!! Such a creative mama you are!
ReplyDeletelisa