Eight and a half years ago, my son and I moved to Gainesville, because my boyfriend wanted to work on his PHD at the University of Florida. I didn't know what to expect here and Florida took some getting used to. I really wasn't sure I wanted to stay. I'm a Midwestern girl and we didn't have fire ants, banana spiders, and giant flying cockroaches where I grew up. Having a good job can make all the difference when trying to fit into a new place and my first job in Gainesville was not a good fit for me.
Then I answered an ad for a teacher's aid position at Trilogy, a small private school in a little house with a white picket fence out front. I went for an interview with the younger elementary teacher, Kristen, and one of the principles,Terry, but I didn't have any childcare for my two year old son, so he had to come with me. The two women were completely unflustered, as we conducted our entire discussion while following my son from computer to computer all over the building. Afterwards, I was told that the flexibility I showed during that very active interview contributed greatly to me getting the job.
Starting work at Trilogy really changed my opinion of Gainesville. Once I was doing something I enjoyed, I was able to come to love this community.
During the eight years that I have worked at Trilogy, I have had many different jobs, teacher's aid for younger elementary, older elementary, and middle school, tutor, substitute, language arts teacher, history teacher, and keeper of the elementary blog. The consistent thing throughout all those positions, was that I enjoyed working with the Trilogy staff and children. It's a small school, even though it has grown out of that little house with the white picket fence. We really are all family.
I just found out a few days ago, that my husband has been offered a job in Tallahassee. Although he's not quite done with his PHD dissertation, he's very close, and that is something he can do while working. His new job will begin July 23, so I will not be returning to Trilogy in the fall.
I went through my photographs and put together a little good-bye slide show. I'm sorry it's a little light on older pictures. I didn't have a digital camera back then.
Please enjoy this and thank you all for being part of our lives.
Thursday, May 31, 2012
Tuesday, May 29, 2012
A New Job in a New Town
We have been in Gainesville, Florida for about 8 1/2 years. Blaze doesn't remember living anyplace else, but we will be moving by the end of July. DH has accepted a job in Tallahassee. We are hoping to be able to all live off his salary, so that I can go back to full-time homeschooling with Blaze.
I will post things from time to time, but my blog posts may become less frequent until after we have resettled. Two months is going to be a very short time to pack up all our belongings, find a new place to live in a city that is about 2 1/2 hours away, and get moved.
I've started packing Blaze's books first, because I only refinished one of his two big bookshelves last year and I'd like to make the other one match before we move.
Sunday, May 27, 2012
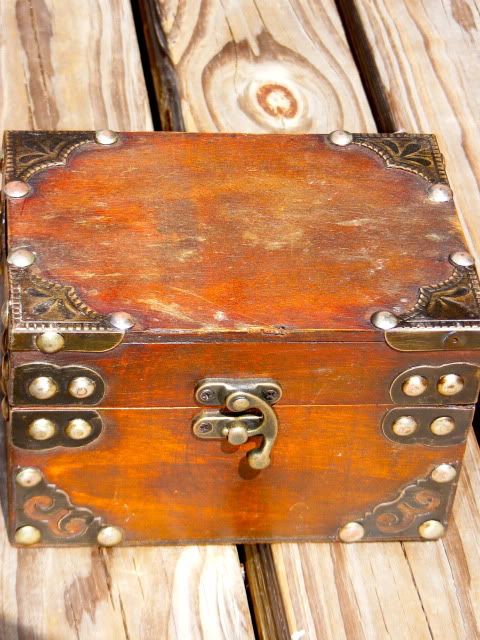
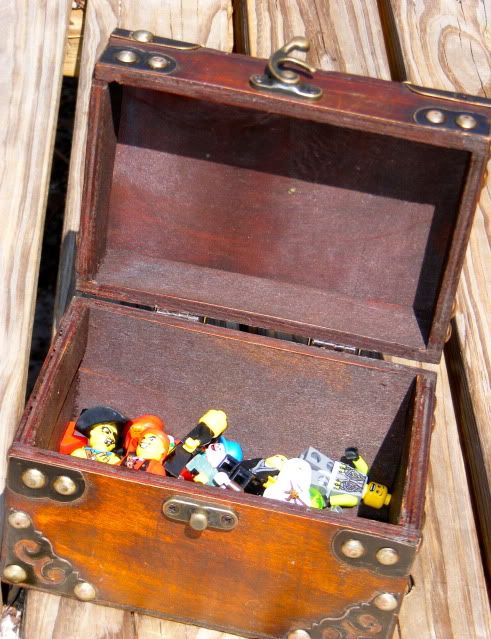
A Travel Box for the Legos
Blaze wanted to bring Legos with on our last trip to Illinois, so we filled a plastic box that had a lid. This seemed like a good idea until I had to put the breaks on quickly and the plastic box went flying. The lid came off and tiny Lego pieces went everywhere. That turned out not to be the only time during the trip when that box lid would be a problem.
During the trip, we added a small, more securely latched, box to hold the Lego people, so they were simple to find.
It was about $5 at Hobby Lobby (on a 50% off sale).
After the trip, DH brought home an old ammo box to be the new travel Lego case. There are no worries about this opening if it falls off the car seat.
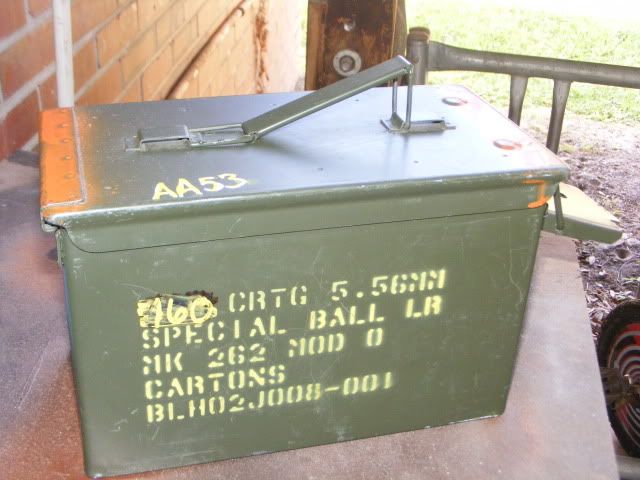
It was kind of ugly, though, with the orange paint on two of the top edges, so I used "Hammered Copper" spray paint on it, inside and out. Two coats covered up all the lettering and scuff marks. It really is amazing what a new coat of paint can do!
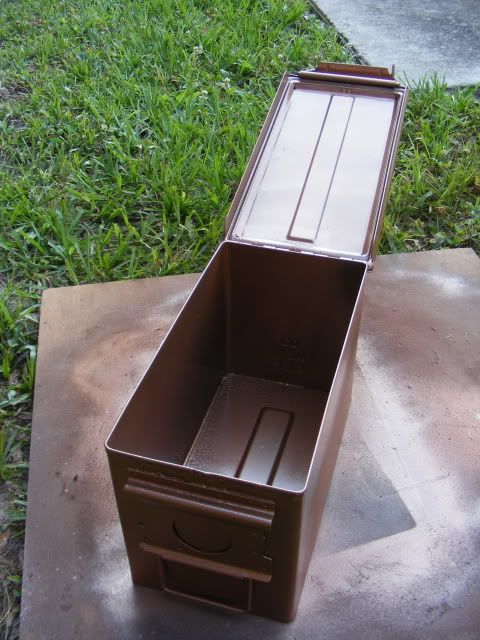
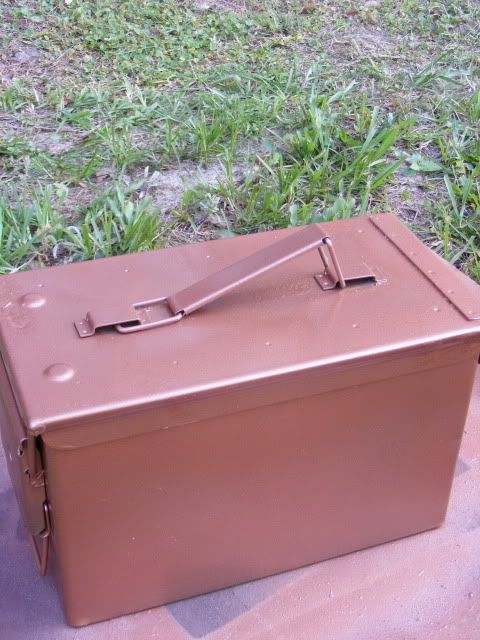
Blaze can fill it with Legos and play with magnets on the outside of the box.
During the trip, we added a small, more securely latched, box to hold the Lego people, so they were simple to find.
It was about $5 at Hobby Lobby (on a 50% off sale).


After the trip, DH brought home an old ammo box to be the new travel Lego case. There are no worries about this opening if it falls off the car seat.

It was kind of ugly, though, with the orange paint on two of the top edges, so I used "Hammered Copper" spray paint on it, inside and out. Two coats covered up all the lettering and scuff marks. It really is amazing what a new coat of paint can do!


Blaze can fill it with Legos and play with magnets on the outside of the box.
Wednesday, May 23, 2012
The Almond Petit Fours Experiment
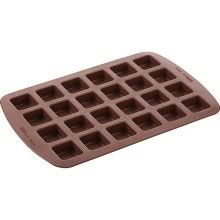
I recently returned from the craft store with a silicone Wilton's Bite-Size Brownie Squares pan, not because I wanted to make bite-size brownies, but because I wanted to see if it would work for making petit fours. The little cakes I made are a little bigger than standard petit fours, but they are all a uniform size and shape, without any hassle, so I am declaring this experiment a success.
I love marzipan, and the baking marzipan was on sale when we went to World Market last weekend, so my trial batch of petit fours was made using this wonderful almond cake recipe. This recipe can be used for other sized cakes, as well, but baking time will have to be increased.
Almond Cake
1 Cup unbleached all-purpose flour
1 1/2 tsp. baking powder
1/2 tsp. salt
8 oz almond paste
1 1/3 Cups sugar
1 Cup butter (room temperature, cubed)
1 tsp. vanilla extract
1 tsp. almond extract
6 eggs
1/4 cup strawberry jam
Preheat oven to 325º.
1. Place 1 Cup flour into a small bowl. Add the baking powder and salt and mix. Set aside.
3. Place almond paste and sugar in the bowl of a stand mixer. Using the paddle attachment, beat the mixture is well blended.
4. Add the cubed butter, vanilla extract, and the almond extract to the almond paste mixture. Beat the mixture until it is smooth.
5. Add the eggs one at a time, beating well after each addition. Gradually beat the flour mixture into the almond paste mixture until the two are well combined.
6. Spray silicone brownie pan with non-stick baking spray. Fill each cavity in the pan about 3/4 full.
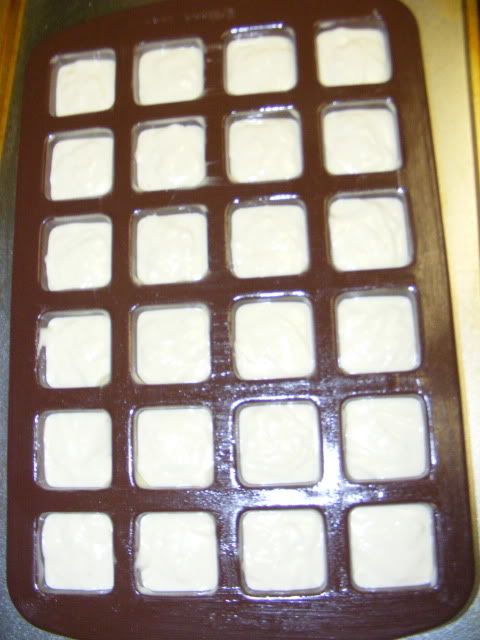
There is enough batter to fill the pan three times, creating three dozen little layer cakes.
7. Bake 25-30 minutes.
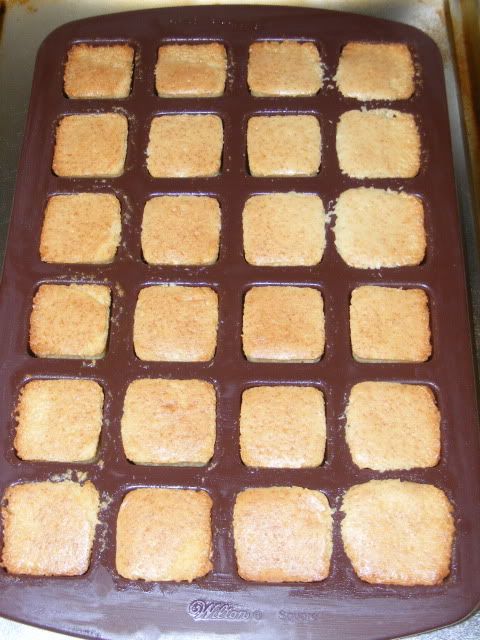
8. Let cool slightly. To be sure the little cakes are evenly flat, use a bread knife to cut the tops of the cakes even with the pan ( the cake tops are very tasty and not to be wasted). Flip pan over to remove cakes.
9. Place several cakes on a piece of parchment paper. Heat strawberry jam for 30 seconds in the microwave. Stir. spoon a little jam onto the top of each cake. Place another cake over the top of the jam, creating a second layer to each cake.
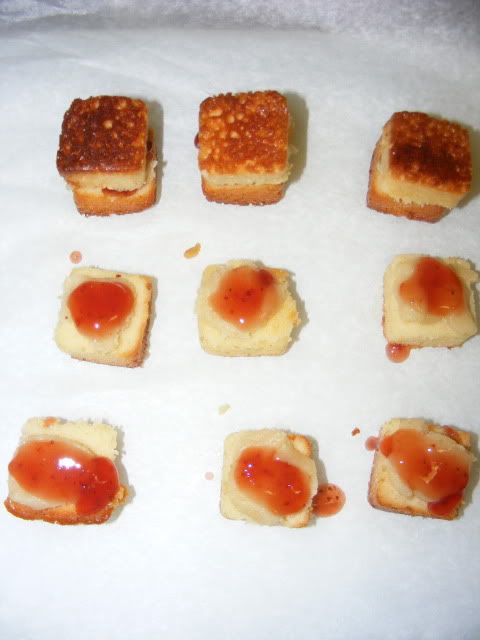
10. Spoon icing over the top of each double layered cake. Let sit until the icing sets up (over night works well).
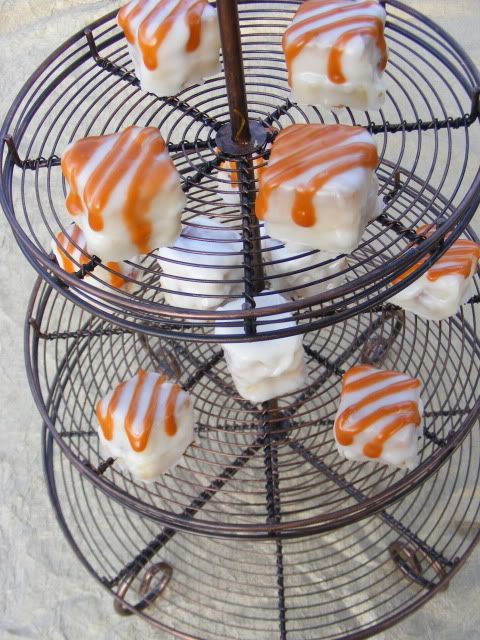
I used the petit fours icing recipe from Martha Stewart: http://www.marthastewart.com/335566/petits-fours-icing My recommendation, is to let the icing sit a bit longer than the 8 minutes recommended by the recipe, especially if the weather is hot and humid, like it is here.
Monday, May 21, 2012
Field School Time Again
DH at Kingsley Plantation:

Once again, it is time for University of Florida archeology field school at Kingsley Plantation and, once again, DH is working and living there. Last week was the first week of work. Then Blaze and I went up there over the weekend. I returned home with a few of the pictures and short movies that DH had taken during the week.
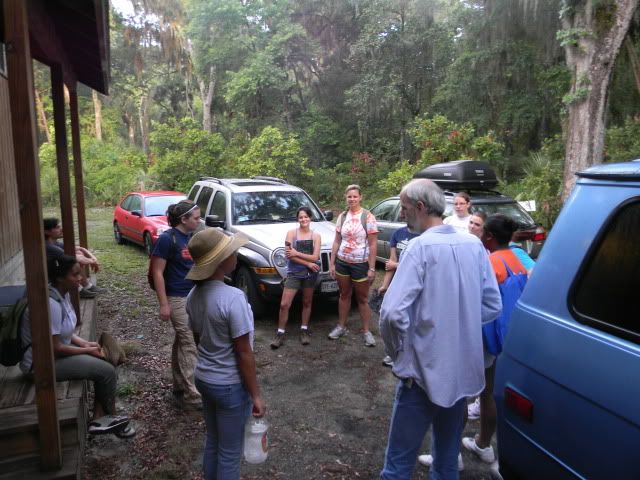
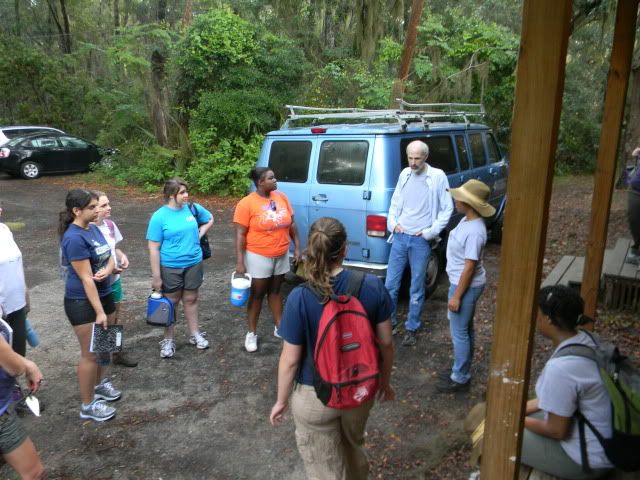
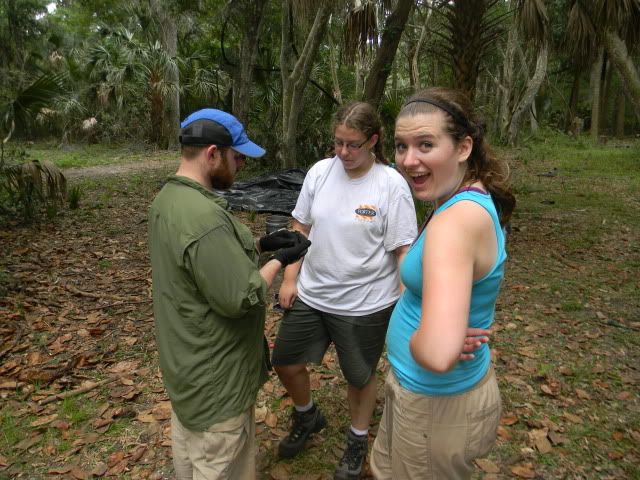
The students are digging in the "yards" of the slave cabins.
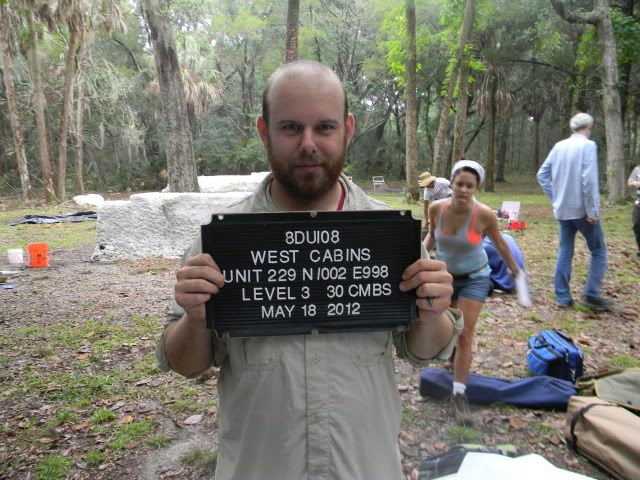

Once again, it is time for University of Florida archeology field school at Kingsley Plantation and, once again, DH is working and living there. Last week was the first week of work. Then Blaze and I went up there over the weekend. I returned home with a few of the pictures and short movies that DH had taken during the week.


The students are digging in the "yards" of the slave cabins.

Sunday, May 20, 2012
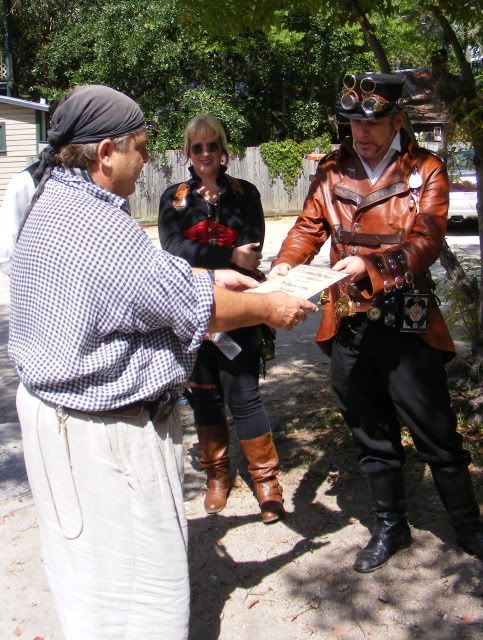
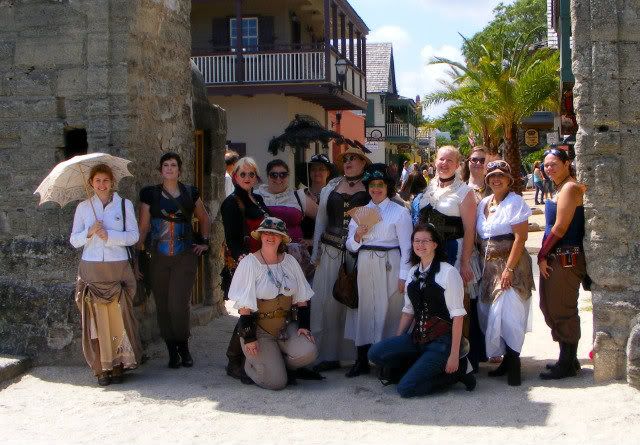
Steampunk Stroll Through St. Augustine
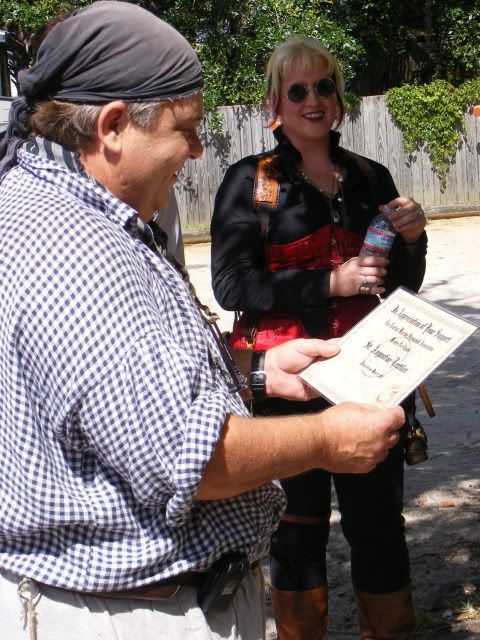
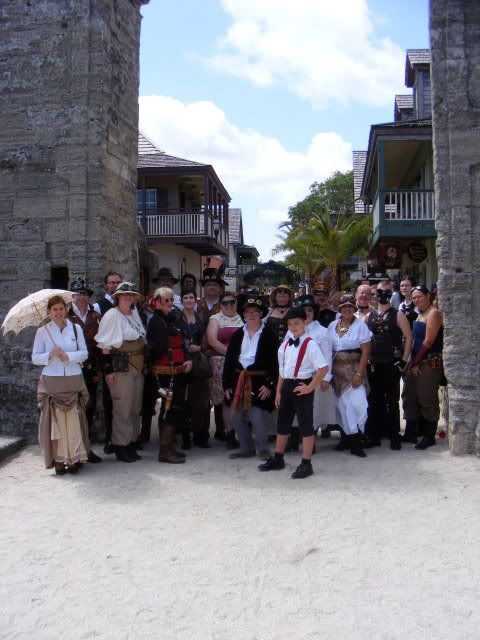
Yesterday was the second steampunk stroll through St. Augustine, organized by the Central Florida Steampunk Association. The turnout was really good for this event, with people coming from several different cities. Our gathering place to begin the walk, was the St. Augustine Textiles shop and to show our appreciation to the shop owner, he was presented with a laminated certificate of thanks.
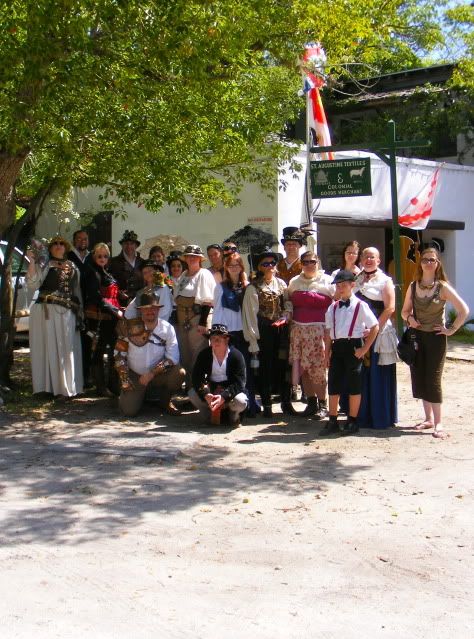

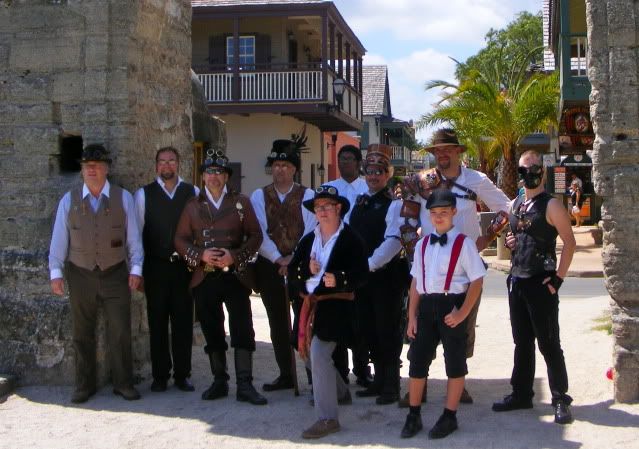
The men of CFSA:
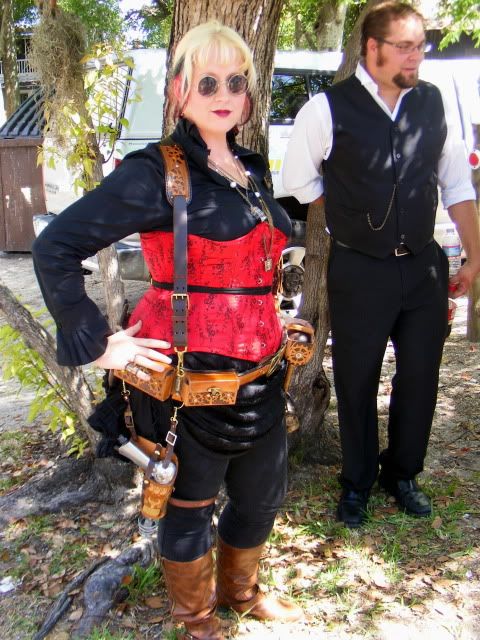
The Ladies of CFSA:
All together now:
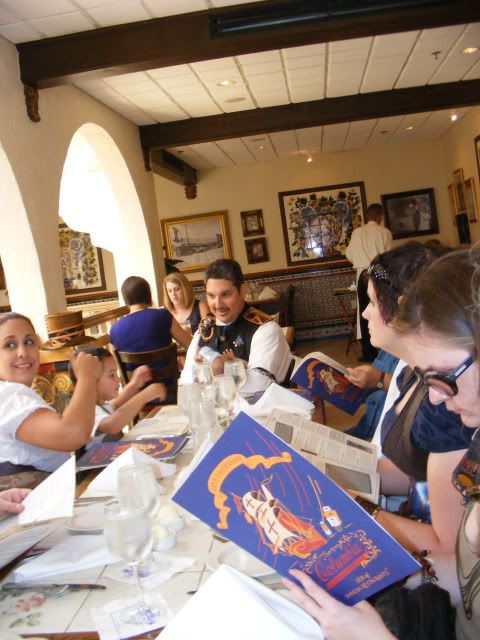
Our group was so big, that we split up at lunch time. Thirteen of us, and a 2 1/2 month old baby, went to the Columbia restaurant for lunch. The 190, Cuban inspired decor went very well with our costumes.
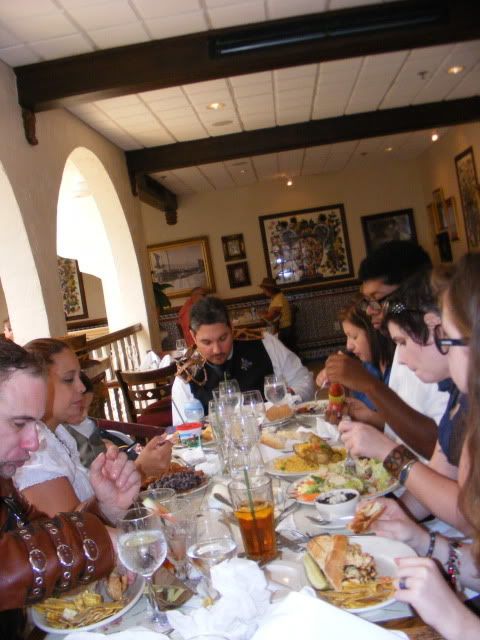
After lunch, we met up again with the rest of our people and continued exploring.
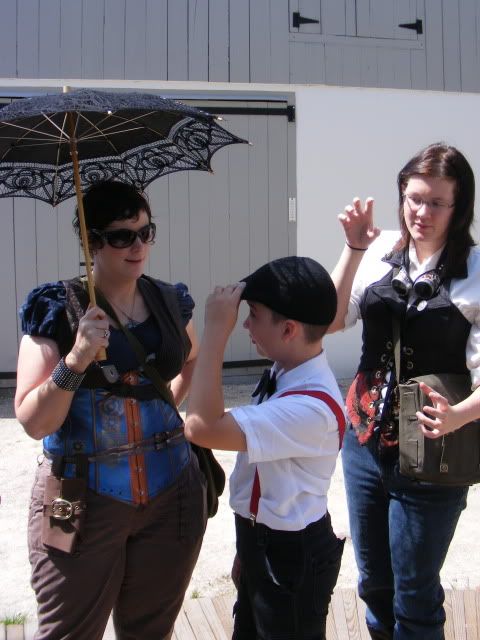
Posting a lookout, to find a few of our members we had misplaced:


St. George Street always has interesting live entertainment. Yesterday, the Columbia Restaurant had an outdoor stage where Flamenco dancers were preforming.


I really enjoyed this musician's playing and his sense of humor.


The men of CFSA:

The Ladies of CFSA:

All together now:

Our group was so big, that we split up at lunch time. Thirteen of us, and a 2 1/2 month old baby, went to the Columbia restaurant for lunch. The 190, Cuban inspired decor went very well with our costumes.


After lunch, we met up again with the rest of our people and continued exploring.
Posting a lookout, to find a few of our members we had misplaced:


St. George Street always has interesting live entertainment. Yesterday, the Columbia Restaurant had an outdoor stage where Flamenco dancers were preforming.


I really enjoyed this musician's playing and his sense of humor.

Thursday, May 17, 2012
Making Silicone Molds
Making my own silicone molds has turned out to be surprisingly simple and I'm very happy with the results.
Silicone molding putty is sold next to the polymer clay (Fimo) at the craft store and costs about $20. That may seem like a lot of money for a small box of putty, until you realize how many molds you can make with that small amount.
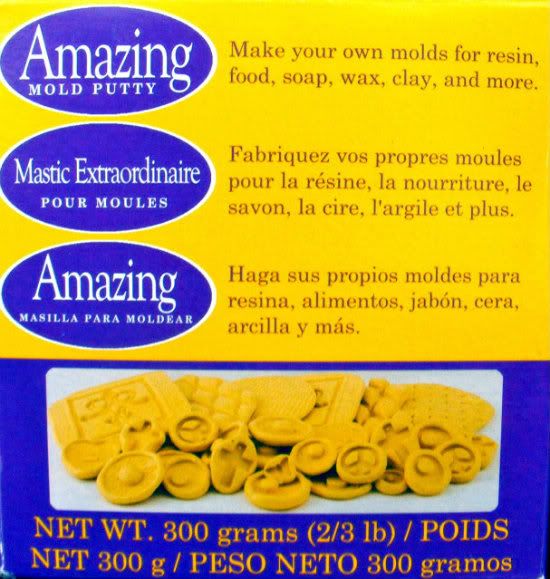
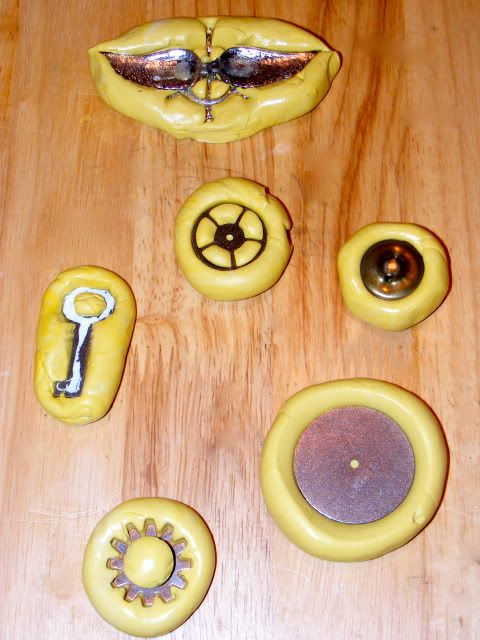
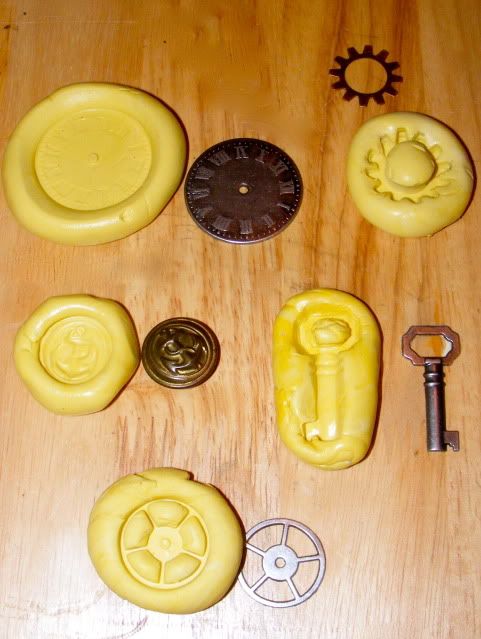
The box contains two containers of putty, one white and one yellow, that must be combined. After the white and yellow putties are mixed together, following package directions, a hard object is pressed into the putty or the putty is molded around one side of the object. This object can be anything, a piece of jewelry, a shell, a rock, a toy, an original design made of clay and hardened, or another mold that you want to duplicate (I did that with the zeppelin candy mold, because I've wanted more than one of those for a long time).
After only 20 minutes, the silicone is set up enough to remove the thing that has been pressed into the putty.
It is recommended that molds used for food should not be used for other things to prevent contamination. Also, if the mold will be used for food, wash well with soap and water, and let dry completely before use.
The molds can be used for many things, such as candy, Fimo creations, candles, cookies, and soap. I made three molds for small guest soaps:
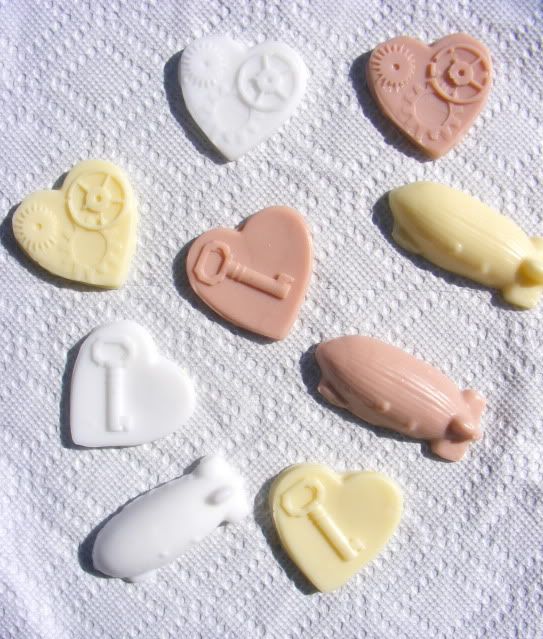
and I tried a little white chocolate in a couple of the smaller molds.
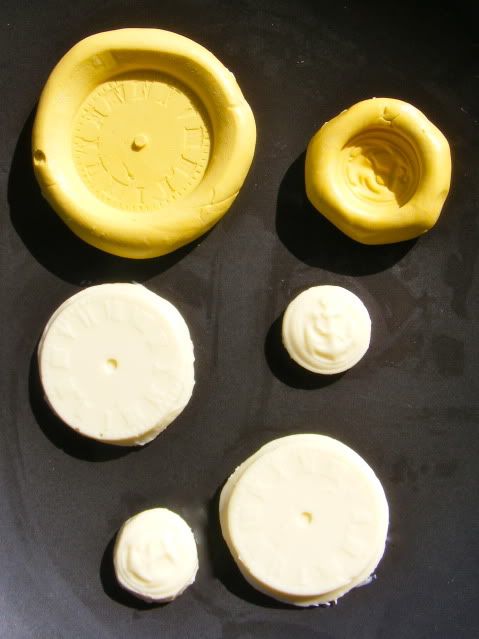
I think the small chocolates would be really cute on top of cupcakes, if I can keep Blaze from eating them faster than I can make them.
Silicone molding putty is sold next to the polymer clay (Fimo) at the craft store and costs about $20. That may seem like a lot of money for a small box of putty, until you realize how many molds you can make with that small amount.

The box contains two containers of putty, one white and one yellow, that must be combined. After the white and yellow putties are mixed together, following package directions, a hard object is pressed into the putty or the putty is molded around one side of the object. This object can be anything, a piece of jewelry, a shell, a rock, a toy, an original design made of clay and hardened, or another mold that you want to duplicate (I did that with the zeppelin candy mold, because I've wanted more than one of those for a long time).

After only 20 minutes, the silicone is set up enough to remove the thing that has been pressed into the putty.

It is recommended that molds used for food should not be used for other things to prevent contamination. Also, if the mold will be used for food, wash well with soap and water, and let dry completely before use.
The molds can be used for many things, such as candy, Fimo creations, candles, cookies, and soap. I made three molds for small guest soaps:

and I tried a little white chocolate in a couple of the smaller molds.

I think the small chocolates would be really cute on top of cupcakes, if I can keep Blaze from eating them faster than I can make them.
Subscribe to:
Posts (Atom)
Crafty Crow
